|
|
Title: PHP 画图应用 验证码 柱状图
Author: MoreWindows
Blog: http://blog.csdn.net/MoreWindows
KeyWord: PHP画图 验证码 柱状图 imagefilledarc
阅读本文之前,推荐先参阅姊妹篇《PHP 画图基础》。
本篇介绍如何使用PHP常用的绘图函数来生成验证码图片和柱状图。
一.验证码 在网站中验证码是非常有用的,下图就是一个含4个数字的验证码图片。
简单的验证码图片主要通过在正确内容上增加一些干扰的点和线。这种方法实现起来方便容易,作为示范,本文实现了一个随机字体(有10种字体文件),支持随机文字颜色,有干扰点,干扰线的验证码类,此类可以批量在磁盘上生成验证码图片并指定验证码由多少个数字多少个字母组成。具体功能可以参阅代码:- <?php
- //PHP生成验证码
- // by MoreWindows( http://blog.csdn.net/MoreWindows )
- class CSecurity_verify
- {
- private $m_image;
- private $m_dir_name;
- private $m_image_width;
- private $m_image_height;
- private $m_digit_num;
- private $m_letter_num;
- private $m_font_color;
- const NOISE_DOT_NUM = 100; //干扰点个数
- const NOISE_LINE_NUM = 40; //干扰线个数
-
- /*
- * $dir_name 保存验证码图片的文件夹目录(绝对路径)
- * $digit_num 数字个数
- * $letter_num 字母个数
- * $width 验证码图片宽
- * $height 验证码图片高
- */
- public function __construct($dir_name, $digit_num, $letter_num, $width = 140, $height = 40)
- {
- $this->m_dir_name = $dir_name;
- $this->m_digit_num = $digit_num;
- $this->m_letter_num = $letter_num;
- $this->m_image_width = $width;
- $this->m_image_height = $height;
- }
-
- /*
- * 在指定目录上生成指定条件的验证码图片
- * $verify_pic_num 要生成多少张验证码图片
- */
- public function BatchVerifyPicture($verify_pic_num)
- {
- while ($verify_pic_num >= 0)
- {
- $verify_pic_num--;
- self::CreateVerifyImage();
- self::DrawNoiseDot();
- self::DrawNoiseLine();
- $verify_text = self::GetVerifyText();
- $filesize = self::DrawVerifyImage($verify_text);
- if ($filesize != -1)
- echo $verify_text . ".png生成成功,大小" . $filesize . "字节 <br />";
- else
- echo $verify_text . ".png生成失败<br />";
- }
- }
-
- /*
- * 创建图片
- */
- protected function CreateVerifyImage()
- {
- $this->m_image = imagecreatetruecolor($this->m_image_width, $this->m_image_height) or die("CreateVerifyImage failde");
- $black_color = imagecolorallocate($this->m_image, 243, 251, 254);
- imagefill($this->m_image, 0, 0, $black_color);//设置底色
- //字体颜色
- $m_font_color = imagecolorallocate($this->m_image, mt_rand(0, 120), mt_rand(0, 120), mt_rand(0, 120));
- }
- /*
- * 生成验证码内容
- * 验证码中使用的字符,01IOQ容易混淆,故不用。
- */
- protected function GetVerifyText()
- {
- $verify_text = "";
- $letter_array = "ABCDEFGHJKLMNPRSTUVWXYZ";
- $digit_num = $this->m_digit_num;
- $letter_num = $this->m_letter_num;
- while ($digit_num--) //数字
- $verify_text .= mt_rand(2, 9);
- while ($letter_num--) //字母
- $verify_text .= $letter_array[mt_rand(0, 22)];
- return $verify_text;
- }
-
- /*
- * 绘验证码
- */
- protected function DrawVerifyImage($verify_text)
- {
- //字体文件
- $font_file = "ttfs\\t" . mt_rand(1, 10) . ".ttf";
- //
- $verify_text_show = "";
- for ($i = 0; $i < strlen($verify_text); $i++)
- $verify_text_show .= ($verify_text[$i] . " ");
- //文字的大小,角度,位置
- $font_size = 20;
- $font_angle = mt_rand(0, 5);
- $font_pos_x = 0;
- $font_pos_y = $this->m_image_height - 5;
- imagettftext($this->m_image, $font_size, $font_angle, $font_pos_x, $font_pos_y, $this->m_font_color, $font_file, $verify_text_show);
- $verify_image_filename = $this->m_dir_name . "\\$verify_text.png";
- if (!imagepng($this->m_image, $verify_image_filename))
- return -1;
- imagedestroy($this->m_image);
- return filesize($verify_image_filename);
- }
-
- /*
- * 绘干扰点
- */
- protected function DrawNoiseDot()
- {
- $noise_dot_color = $this->m_font_color;
- for ($i = 0; $i < self::NOISE_DOT_NUM; $i++)
- {
- imagesetpixel($this->m_image, mt_rand(0, $this->m_image_width), mt_rand(0, $this->m_image_height), $noise_dot_color);
- }
- }
-
- /*
- * 绘干扰线
- */
- protected function DrawNoiseLine()
- {
- for ($i = 0; $i < self::NOISE_LINE_NUM; $i++)
- {
- $noise_line_color = imagecolorallocate($this->m_image, mt_rand(50, 120), mt_rand(50, 120), mt_rand(50, 120));
- imageline($this->m_image, mt_rand(0, $this->m_image_width), mt_rand(0, $this->m_image_height), mt_rand(0, $this->m_image_width), mt_rand(0, $this->m_image_height), $noise_line_color);
- }
- }
- }
- ?>
- <?php
- require_once 'CSecurity_verify.php';
- $test = new CSecurity_verify("D:\", 4, 0);
- $test->BatchVerifyPicture(6);
- ?>
当然还有很多特效可以加入的,如文字水波化、背景增加彩色小字母干扰等等,这些都可以有效的美化验证码图片。有需要的筒子们可以深入学习下,这里就不细究了。
注 程序所使用字体文件可以从C:\Windows\Fonts中选择,并拷贝到PHP文件所在目录中的ttfs文件夹。
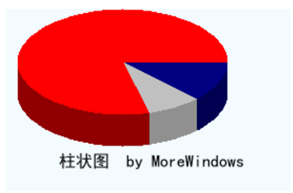
二.柱状图 在PHP中绘制柱状图可以使用bool imagefilledarc( resource $image , int $cx , int $cy , int $w , int $h , int $s , int $e , int $color , int $style )函数。此函数的说明可以参考《PHP 画图基础》一文,柱状图原理很简单就是先用暗色绘制多层再用亮色绘制最上层,这样明暗对比就可以产生立体效果。具体过程可以参考下图:
再给出一个PHP根据各数据值来生成柱状图的示例代码:- <?php
- //柱状图
- // by MoreWindows( http://blog.csdn.net/MoreWindows )
- $image_width = 400;
- $image_height = 300;
- $image = imagecreatetruecolor($image_width, $image_height);
- $black_color = imagecolorallocate($image, 243, 251, 254);
- imagefill($image, 0, 0, $black_color);//设置底色
- //亮色
- $gray_color = imagecolorallocate($image, 0xC0, 0xC0, 0xC0);
- $navy_color = imagecolorallocate($image, 0x00, 0x00, 0x80);
- $red_color = imagecolorallocate($image, 0xFF, 0x00, 0x00);
- //暗色
- $darkgray_color = imagecolorallocate($image, 0x90, 0x90, 0x90);
- $darknavy_color = imagecolorallocate($image, 0x00, 0x00, 0x50);
- $darkred_color = imagecolorallocate($image, 0x90, 0x00, 0x00);
- //各份份量大小
- $value_array = array(12.5, 8.4, 79.1);
- $all_value = array_sum($value_array);
- $color_array = array($gray_color, $navy_color, $red_color);
- $drak_color_array = array($darkgray_color, $darknavy_color, $darkred_color);
- //先用暗色绘制30层
- for ($i = 80; $i > 50; $i--)
- {
- $angle_begin = 0;
- $angle_end = 0;
- foreach ($value_array as $j=>$val)
- {
- $angle_begin = $angle_end;
- $angle_end += $val * 360 / $all_value;
- imagefilledarc($image, 100, $i, 200, 100, $angle_begin, $angle_end, $drak_color_array[$j], IMG_ARC_PIE);
- }
- }
- //最上层再用亮色绘图,这样就有立体效果了。
- $angle_begin = 0;
- $angle_end = 0;
- foreach ($value_array as $j=>$val)
- {
- $angle_begin = $angle_end;
- $angle_end += $val * 360 / $all_value;
- imagefilledarc($image, 100, $i, 200, 100, $angle_begin, $angle_end, $color_array[$j], IMG_ARC_PIE);
- }
- // flush image
- header('Content-type: image/png');
- imagepng($image);
- imagedestroy($image);
- ?>
总体来说,PHP的绘图功能还是方便强大的,有需要的筒子们还可以试下PHPlot来绘图,其类库功能强大,使用也方便。
转载请标明出处,原文地址:http://blog.csdn.net/morewindows/article/details/7289686
作者:MoreWindows 发表于2012-2-24 10:24:48 原文链接
|
|

 IP卡
IP卡 狗仔卡
狗仔卡 发表于 2012-2-24 14:49:07


 提升卡
提升卡 置顶卡
置顶卡 沉默卡
沉默卡 喧嚣卡
喧嚣卡 变色卡
变色卡 显身卡
显身卡